Where to connect the jumper cables

Volvo 850 jumper cable location

  • If the booster battery to be used is in another car, check that the cars are not touching to prevent premature completion of negative circuit. Note the position of the battery terminals and using jumper cables:
  • First connect the booster battery positive (+) terminal (1) to car battery positive (+) terminal (2).

  • Then connect the booster battery negative (-) terminal (3) to a stationary solid metal part on the engine at a point away from the battery (4).

    Do not connect booster cable to any part of fuel system or any moving parts. Avoid touching hot manifolds.
    After the engine has started, first remove the negative (-) terminal jumper cable. Then remove the positive (+) terminal jumper cable.
  • Volvo 850 Charging problem

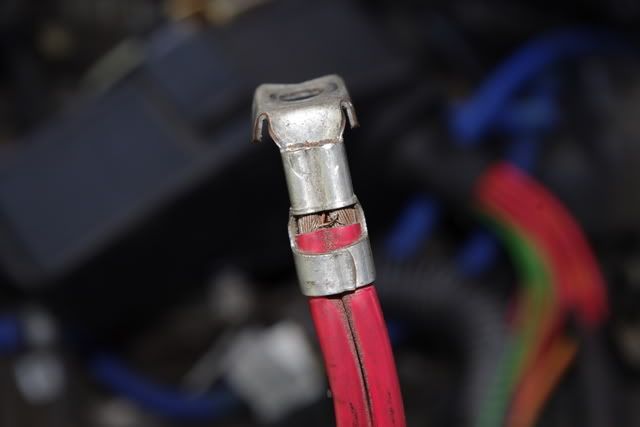
     On cars of this type and age, the crimp on the positive terminal can fail turning the positive wire to the battery into a resistor rather than a wire.  This is diagnosed by measuring the charging voltage on the battery and giggling the wire (it will jump around, and not remain at the required 13.8 V), and by noticing that the wire itself is hot.  Volvo recently released a fix for this, and previously the shop had to remove the entire wiring harness, at great expense, to fix it. 


    850 fuel tank gauge info


    The fuel tank holds approximately 19.3 US gals. (73 liters). When the warning light comes on, there is approximately 1.8 US gals. (8 liters) of fuel remaining in the tank. When it reads empty, your screwed.

    850 Owners manual


    Get one HERE.

    850 Volvo Brake specs

    DISC BRAKE SPECIFICATIONS TABLE
    Application In. (mm) Disc Diameter
    Front ……………………………….. 11.02 (280)
    Rear ………………………………… 11.61 (295) Lateral Runout (Maximum)
    Front ………………………………… .001 (.04) Rear …………………………………. .003 (.08)
    Original Thickness
    Front …………………………………. 1.02 (26) Rear ………………………………….. .38 (9.6) Minimum Refinish Thickness …………………….. (1)
    Discard Thickness
    Front ………………………………….. .90 (23) Rear ………………………………….. .33 (8.4)
    Parking Brake Drum (Inside Rotor)
    Maximum Runout ………………………….. .006 (.15)
    (1) – Always use minimum thickness specification stamped on rotors.

    Volvo pressure bleeding tricks

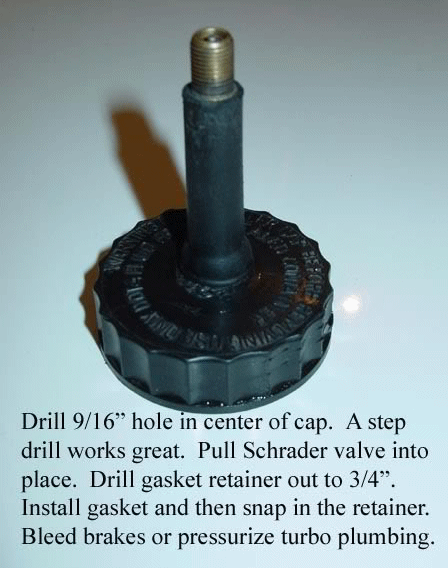
    Use the above modified cap with a bicycle pump.

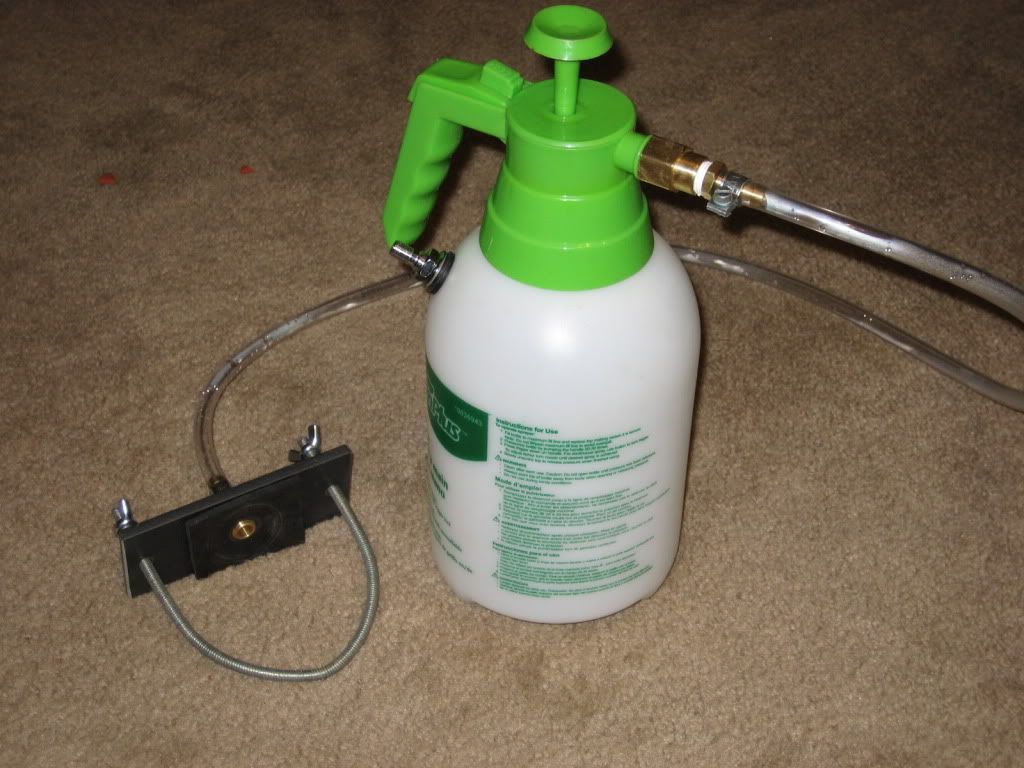
    Home-Made Pressure Bleeder. [TV Pierce] You can make your own pressure bleeder. Power Motive's is nothing more than a garden sprayer with a brake reservoir cap attached to the end of the tube instead of a spray nozzle (they also add a pressure guage -- but it's not really necessary). The sprayer is about $10 at Home Depot, and a new reservoir cap should be $2-$3 at FCP Groton. Drill a hole through the cap, epoxy a tube fitting through the hole, then cut off the spray nozzle, and attach the reservoir cap.
    [Gary Gilliam] I made mine out of a cheap all plastic 4 liter ( about $13) garden sprayer, and an old master cap. I cut the hose just above the sprayer wand, attached a 5/16" brass fitting that is commonly used for repairing air lines: it is barbed on one end to stick inside the hose and has 1/4" NPT threads on the other. This was secured to the hose with a stainless hose clamp and a 1/2" hole was drilled in the extra master cylinder cap to receive the other end of the fitting. The fitting was secured to the cap with a 1/2" long brass NPT straight connector, adding a rubber washer on both sides coated in RTV for good measure. I was going to add a pressure gauge, but never got around to it. It seems to work fine with just enough pumps to get things moving a bit.

    Sucking out the old fluid- Turkey baster

    Pressure bottle. Learn how to make it HERE.


    Volvo 850 Bleeding the brakes

    Bleeding hose attached

    NOTE: Use only DOT 4 grade brake fluid.

    1) Raise and support vehicle. Fill master cylinder reservoir
    to maximum mark. Bleed brakes in sequence. See
    BRAKELINE BLEEDING SEQUENCE. After bleeding brakes, depress
    brake pedal with a force equal to an abrupt stop.

    2) Pedal travel should not exceed 1.57" (40 mm). Brake
    warning light should not illuminate. If air is still present in
    system, repeat procedure.

    BRAKELINE BLEEDING SEQUENCE TABLE
    850 ..................................... LR Or RR, RF, LF